

Have you ever walked around the craft store and were struck with inspiration? You get home and go online only to find someone else already came up with this? Yeah, so apparently I didn't invent these DIY photo blocks. What the heck, I'll share it anyway. It's a good reminder to get those photos out of your camera, phone and computers!
You need:
Wood Block(Michael's $4.69, don't forget to look for coupons!)
Photos
Mod Podge
Scissors or paper trimmer
Foam brush

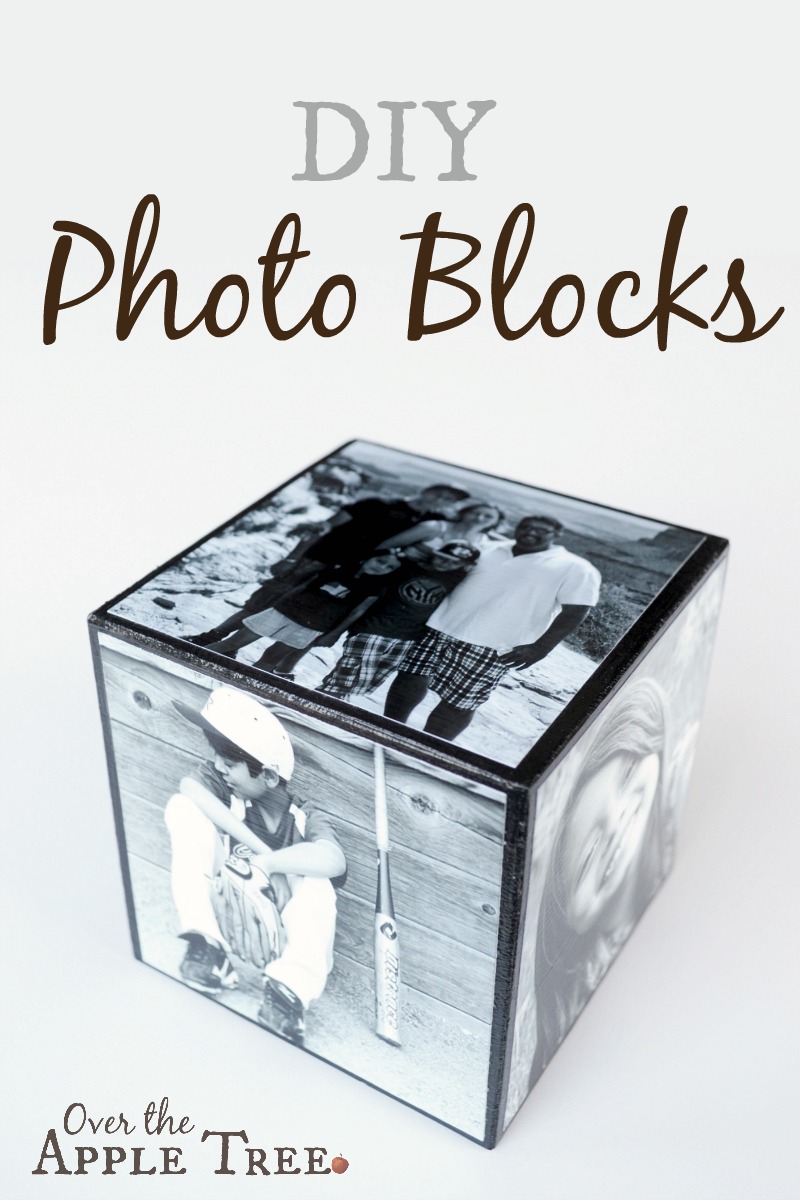
These blocks are about 3 ½ squares so 4x6 photos will need to be trimmed. Take the time to make sure photos are cut evenly. The fastest way I found was to make a square template. I cut my photos slightly smaller than the square. Before I stuck on photos, I painted the corners of the cube black. Since there will be no photo on the bottom I painted that black as well.
Using a foam brush, I applied a thin layer of Mod Podge to one side of block. Carefully position the photo onto the block and press down. Repeat for all sides and allow to dry. You'll probably have to wait for a couple sides to dry before you can do the other sides. You don't want the Mod Podge to smudge or photos to move before they are dry.
Use a white pen or paint to write a message or the year on the bottom of the block. After the first layer of Mod Podge dries, do another layer of Mod Podge on top of the photos on all sides. Allow block to dry thoroughly before handling.
Thank you so much for visiting my blog!
Project Gallery
Project Gallery
I will be sharing with these great blogs!
Follow me here:
No comments:
Post a Comment